Showing posts with label processes. Show all posts

07 September 2009

Out of my comfort zone

I don't really like the colour orange. (I'm not keen on yellow or mustard colours either.) I guess I prefer cooler colours like greens and purples and blues, although I'm a big fan of red as well.

So I wasn't very impressed when some polymer clay beads went "wrong" on me and I ended up with orange.

Orange and copper beaded necklaceI was playing with translucent clay and alcohol inks and made a lovely warm red colour. I added copper leaf and I was really happy until they came out of the oven... ORANGE!

A similar set I made at the same time with out-of-the-packet trans red and silver leaf looked exactly as I expected.

Ah well. Next experiment - red sand in translucent clay. Came out... you guessed it, orange.

So I thought, I'm being a bit prejudiced here. Plenty of people like orange, if I make some jewellery with the beads I don't like, someone else might love it. And I grabbed the offending beads, some copper wire and some other bits and pieces and almost forced myself to make a necklace.

And you know what? I actually like it. I'd like it a whole lot better if it was purple, but I like it.
Orange and copper beaded necklace
And just for Carrie, here's how I did it.

I mixed alcohol inks into translucent clay. Note that the colour may be different when baked, so you could  do a test bake of a tiny piece before you commit to creating the beads. Adjust the colour if you want to. I also added some gold glitter to the clay and mixed well.

I rolled out a sheet of the coloured trans on the thickest setting, and placed a sheet of copper leaf on top.

Then I rolled this sheet into a jellyroll cane, with the leaf on the inside. It can be difficult to get the clay to stick to the leaf but persevere with it. It doesn't have to be neat but you don't want air bubbles.

Orange and copper beaded necklaceI squared off the jellyroll cane and cut off a piece for the focal bead. I reduced the rest a little and cut it into sections to make the square beads. I softened the edges by gently rolling the bead in my palms, pierced and baked.

I textured the focal bead with rubber stamps, a different one on each side. Once it was pierced and baked I painted on brown acrylic paint, wiping it off the raised portions of the design and leaving it in the impressions.

I mushed up the waste ends of the cane to make some irregular oval beads, which I flattened out, pierced, and baked.

The beads were tumble sanded and buffed to a dull sheen.

Next came the wirework. For the focal bead I made a spiral in a piece of wire hammered it a little, threaded on a small round bead and made a wrapped loop at the top. I made a simple loop either side of the focal bead and dangled the round bead and spiral from it.

Each other link started with a hammered spiral with a straight "tail". I threaded the beads onto the tail and closed it with a loop. The loop attaches to the next wire just after the spiral - the pictures show this much more clearly than I can explain.

Some copper chain and handmade copper fastenings finished the necklace off.

So I learned a lesson. Working outside my comfort zone is good - I created something that's not my usual style, but is still a nice piece, and will mostly likely have an influence on the way my style develops in future. I feel it's helped me grow a little as an artist, and that wouldn't have happened if I'd just thrown out those orange beads.

04 September 2009

I've been featured!


Well technically my pendants have, over at the lovely Cindy's blog.

I've had a lot of positive comments from people I've shown them to, and my local bead shop wants to sell them for me!

This is a great example of modification, which has lead to an original technique.

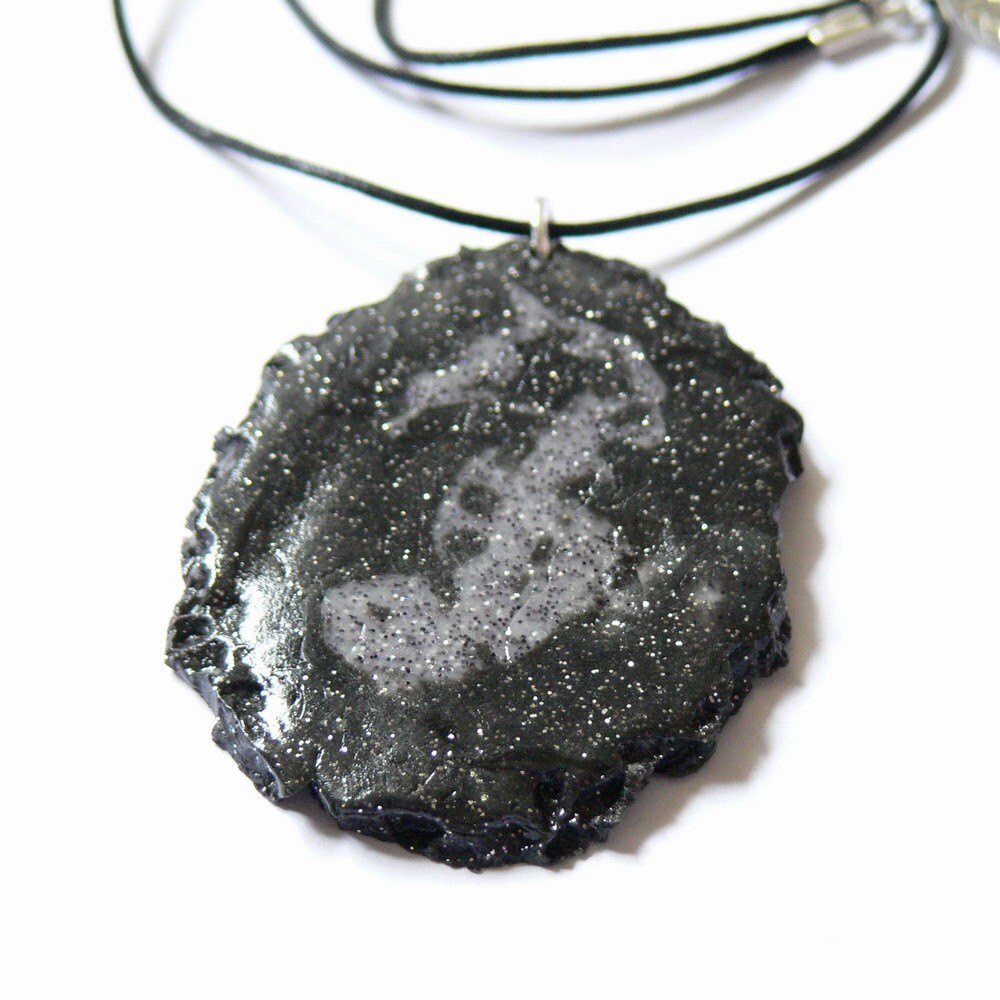
I've seen a lot of polymer clay work with metal leaf and inks - mostly mokume gane but also some funky crackled effects and I think it's cool. And fairly recently I spotted Cindy's take on this, and decided to have a go myself. As I explained on her blog, I couldn't get it right and didn't get the effect I wanted. So I tried a different way.

Here's how my technique goes, very briefly: (Next time I do this I'll be sure to take pictures of the process as I go, then I'll update this post.)

  • Roll out black clay on the thickest setting.
  • Add metal leaf on the top of the clay sheet. I usually use copper because I like the warm colours.
  • Add drops of various colours of alcohol ink and leave to dry. This can take several minutes, I leave it at least 30 to make sure.
  • Roll at next lowest setting. Rotate 90 degrees and roll at next setting after that. Some little bits of leaf will stick but that just adds to the effect so don't worry too much.
  • Lay sheet on a ceramic tile and use cookie cutters to make pendants, disc beads, whatever shape you want. Peel away the waste clay, leaving the pendants/beads stuck down. Make the bead holes now - it's a bit tricky drilling them later.
  • Bake for 30 mins and cool.
  • Trim any rough edges, and add a layer of liquid polymer clay with a paintbrush.
  • Bake again, 30 mins.
  • Repeat with another layer of liquid clay and bake again.
  • Finish with Future/Klear.
Inked metal leaf polymer clay pendantSo yeah, a new technique that works for me.

Here's the same thing done in silver leaf, with some control over ink placement to create a rainbow effect.

I think modification is a useful creative process. Try a tutorial or a project from a magazine or book then think to yourself, how can I change this? What would make it better, easier, suit my style more? Then play around!

It's only by changing things that you learn how they actually work. And the more you learn, the more potential you have to create something truly unique.

29 May 2009

Finishing, or lack of it

First of all I have to apologise - I promised myself when I started this blog that I'd update regularly, and I haven't.

I haven't been well recently, but as often happens I didn't actually realise it at the time! I've been trying to find a balance between working, resting, gardening and creative stuff and not managing very well - there just doesn't seem to be enough time for everything, even though I'm actually not getting much done.

I have done some polymer clay pieces I'm quite pleased with, but they are in various stages of completion at the moment. I have so much sanding to do! I admit I get a bit impatient with beads especially, it takes ages to go through 4 different grits. I wish I could afford a kids rock tumbler, but I can't even find a cheap one in the UK - only expensive ones.

I'm trying really hard to actually get some pieces finished because I'm working towards selling at craft shows later in the year and I need to build up some stock. Maybe I should ban myself from starting anything new to encourage me to just work on the in-progress things!

Hopefully I'll have something to show soon.

In the meantime, here's a picture of one of my very first pieces. It's a faux fossilised seahorse made using the mokume gane technique in stone-effect Fimo.

I still really like it, although I'm considering resanding it a little and buffing with my new Dremel-style rotary tool since it's finished with Fimo gloss. Well it was a while ago, I didn't know any better!

27 March 2009

The hedgehog process

Goodness, it's been so long since I posted! I've been really busy recently with one thing and another, but I have managed to find time to knit a few hoggies and make some new pieces of jewellery.

Anyway, I thought you might like a glimpse into how my hedgehogs are born. The birds and the bees, hedgehog style, you might say!


First of all and probably most importantly, I select yarn colours. Here I've chosen cream for the face, and some gorgeous pink yarn I just bought that also has fuscia and peach in it. Sometimes I use several colours to create completely unique combinations.


I start at the bottom of the hoggy....


...and knit the body.

Then I  break off the body colour and continue with the head.
Head complete. Rather than casting off, I run the tail of the yarn through the stitches so I can pull them up later.
Next, eyes. I make these by knotting yarn (here I've used a navy blue). the knots are complicated to explain, but very easy to do - I learned this technique as a child from my knitted animals book. I like these eyes for hoggies, they look much better than embroidered ones.
The eyes are added by first threading one set of yarn ends through the piece from front to back, then threading the other set in the same way but one stitch lower. The ends are knotted very tightly behind the eye, on the wrong side. Each eye is added separately, then the ends are trimmed close. The hog looks so funny at this stage!
Next I pull up the stitches at the nose, and sew the face closed. I add a nose which is made in exactly the same way as the eyes, but positioned horizontally rather than vertically.
I sew up the body, leaving the bottom end open, and stuff the whole thing with polyester stuffing before gathering up the cast on stitches and fastening off.
The finished hog! Isn't she cute? Now she's ready to join her friends... 
...who are waiting to go off to new homes!